This section provides instructions on how to use the MyDayWidget app. While the guide primarily focuses on iPhone usage, users on iPad and Mac can also find it helpful as a reference.
Essentials
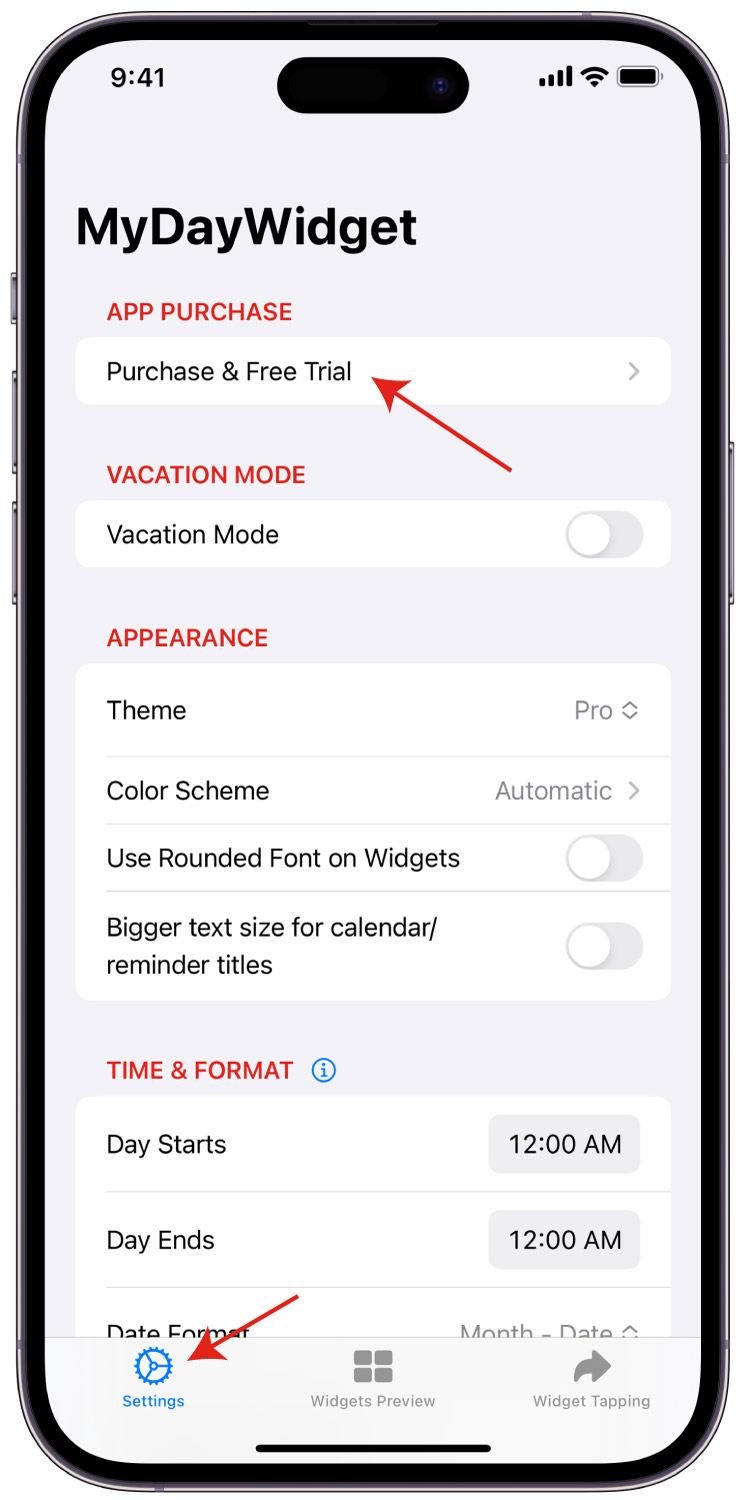
- Getting Started: Acquire a free trial or make a purchase.
- Configure Appearance: Use the ‘Settings’ tab to manage data and appearance.
- Preview Widgets: Check how widgets will appear in the ‘Widgets Preview’ tab.
- Set Widget Tapping Destination: Choose preferred apps in the ‘Widget Tapping’ tab.
- Add Widgets: Place widgets on your Home Screen, Lock Screen, or Notification Center.
Start using MyDayWidget
To start using My Day Widget, you can choose between a 9-day Free Trial or a One-Time Purchase. The Free Trial is completely free, and no credit card is required. It allows you to experience My Day Widget with all its features. After the trial period ends, you will need to make a One-Time Purchase to continue using My Day Widget and receive lifetime updates.
If you find My Day Widget to be the app that suits your needs, simply tap to purchase the ‘One-Time Purchase’ and enjoy unlimited access to all widgets forever, along with lifetime updates.
*Price shown in the image below is for demonstration purpose only.

Adding Widgets to Home Screen on iPhone and iPad
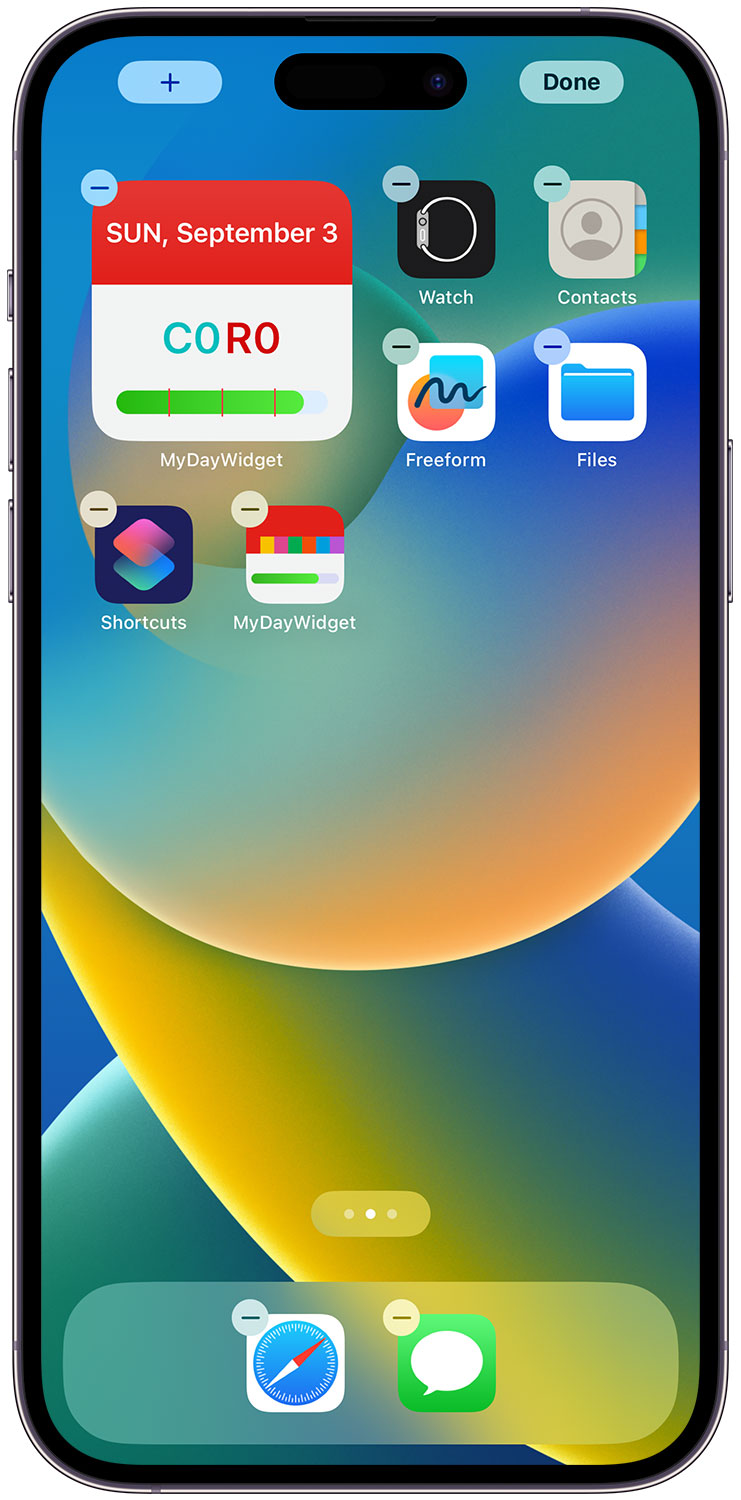
1. From the Home Screen, touch and hold a widget or an empty area until the apps start to jiggle.
2.Tap the Add button in the upper-left corner (look for a ‘+’ icon).
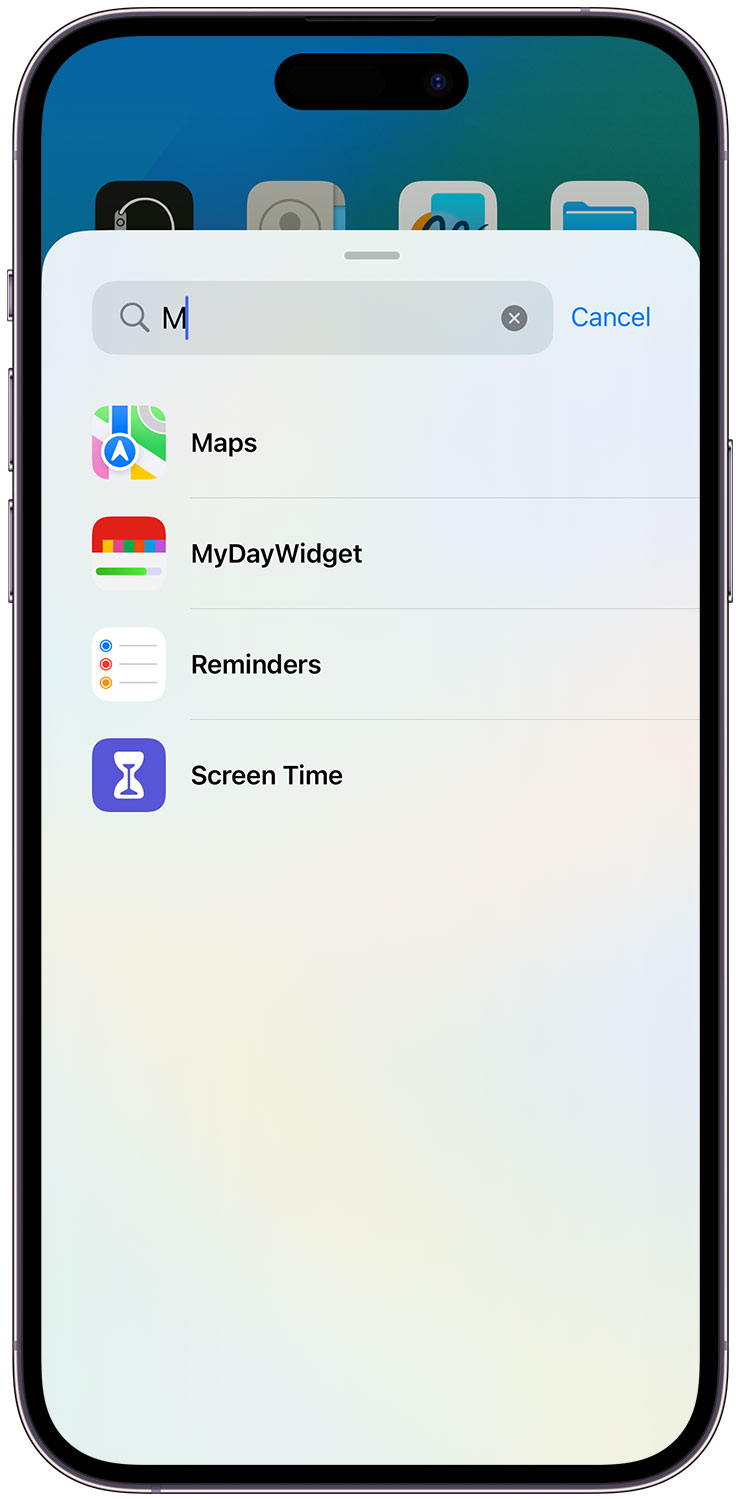
3. You’ll see a list of available widgets. Scroll through the options and tap on MyDayWidget.
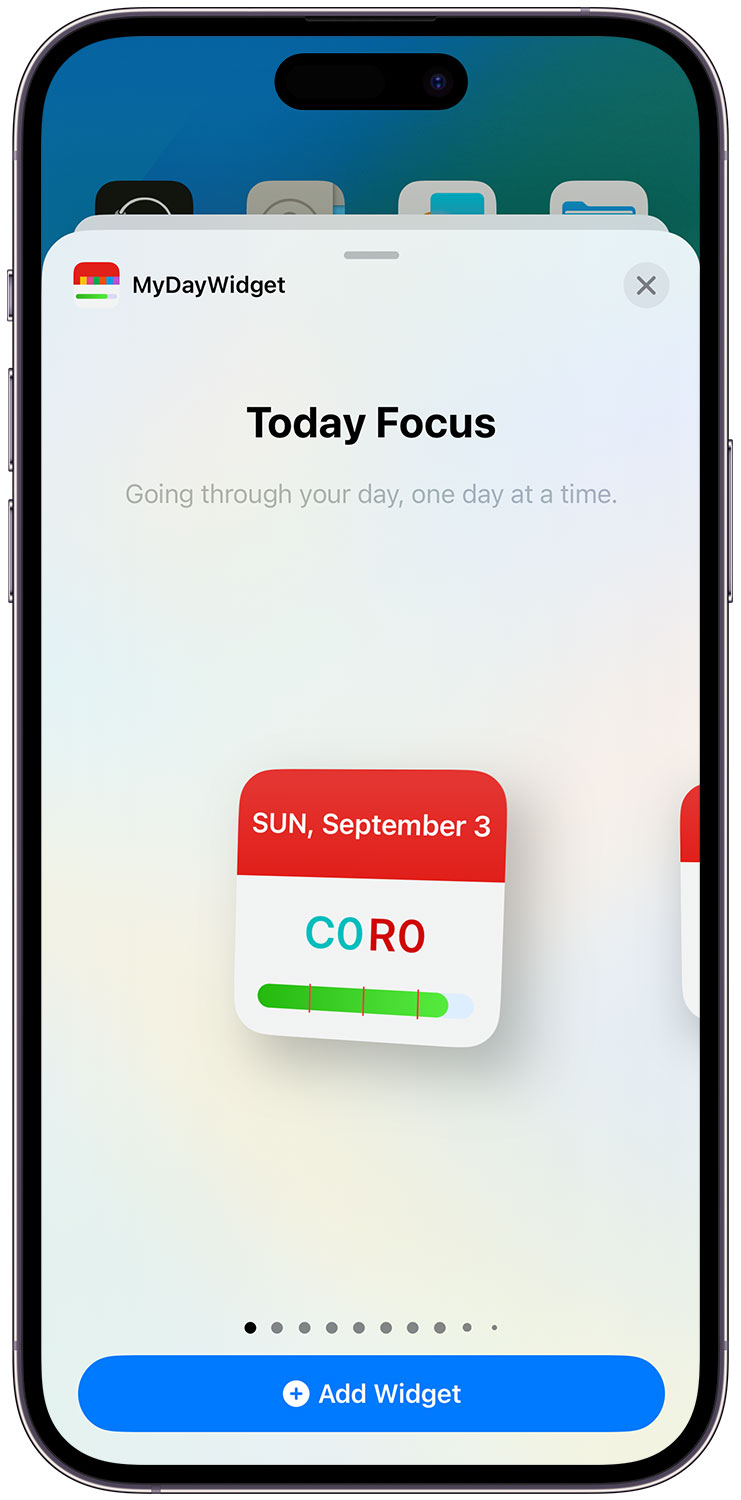
4. Scroll through different widget sizes and designs. Select the one that you prefer, then tap Add Widget.
5. Tap Done in the upper-right corner.
(Similar process for iPad)
For more information please visit: https://support.apple.com/en-us/HT207122

Adding Widgets to Lock Screen on iPhone and iPad
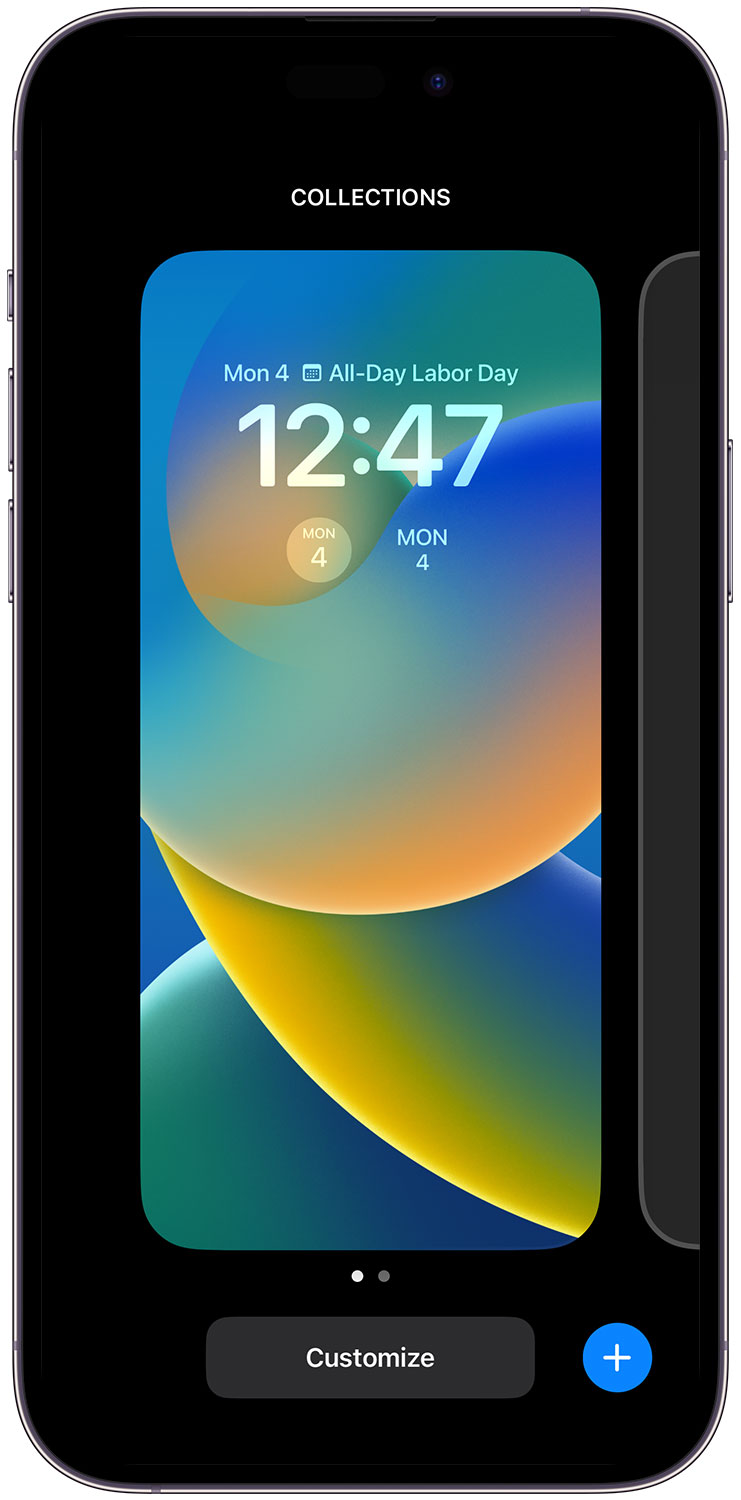
1. On your Lock Screen, touch and hold the screen until the “Customize” button appears, then tap “Customize” at the bottom.
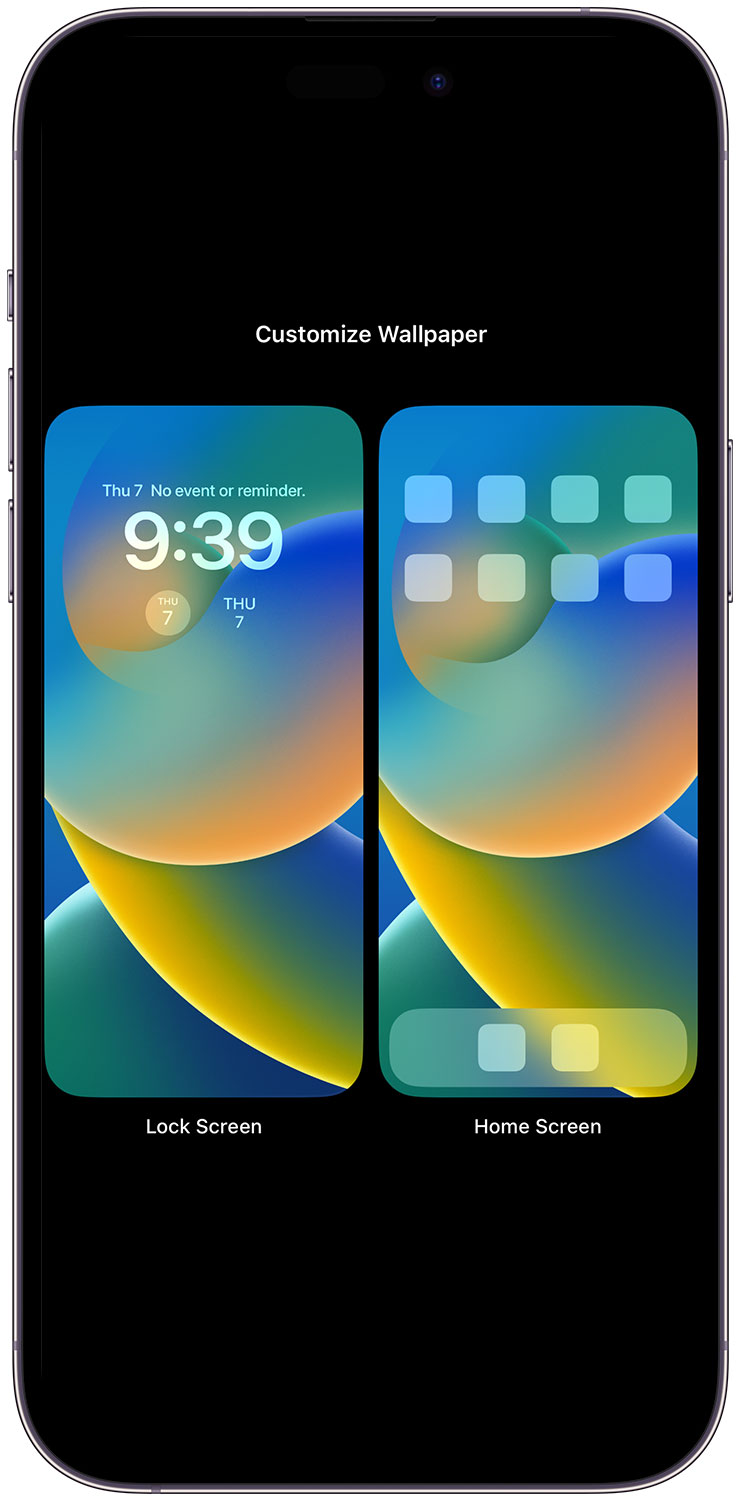
2. Choose “Lock Screen.”
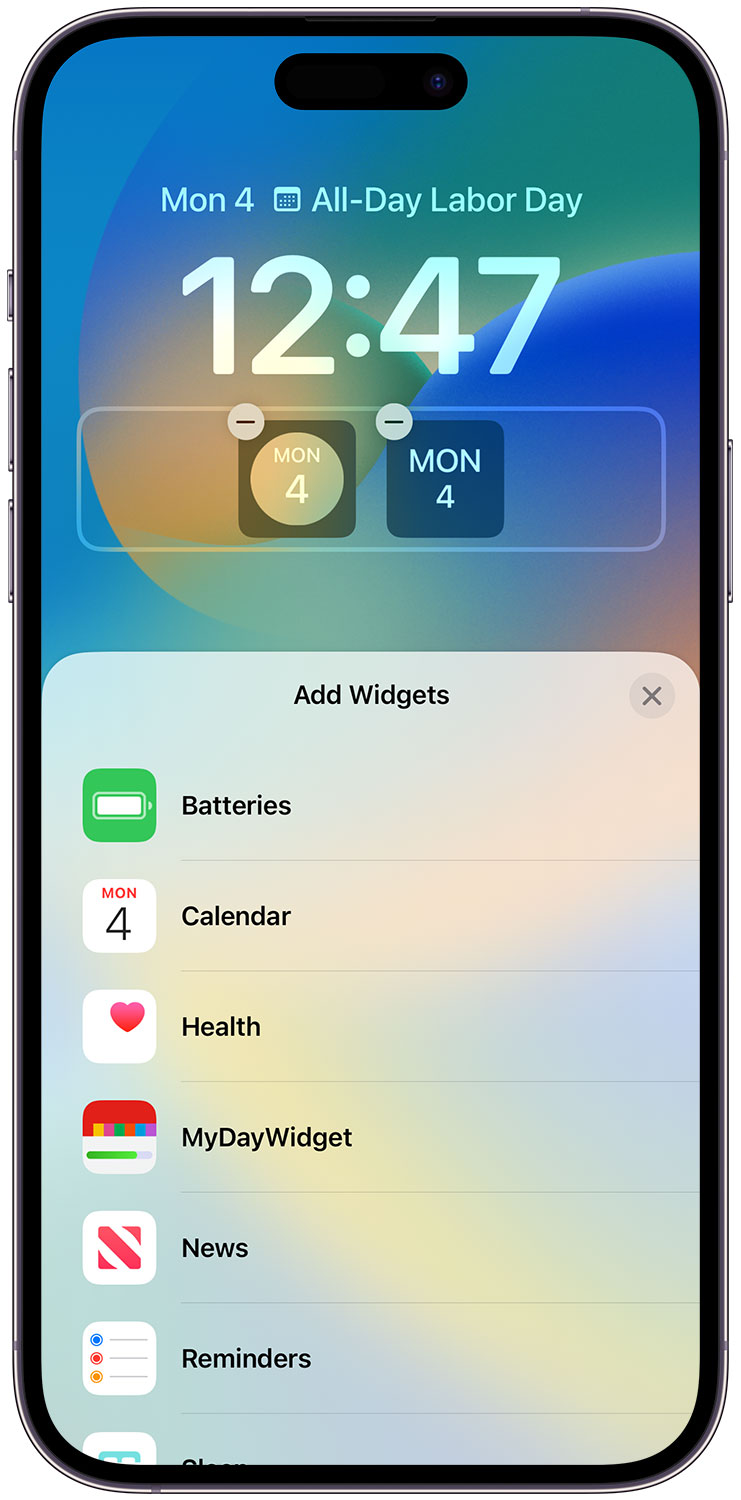
3. Tap “Add Widgets.”
4. Select “MyDayWidget” from the list.
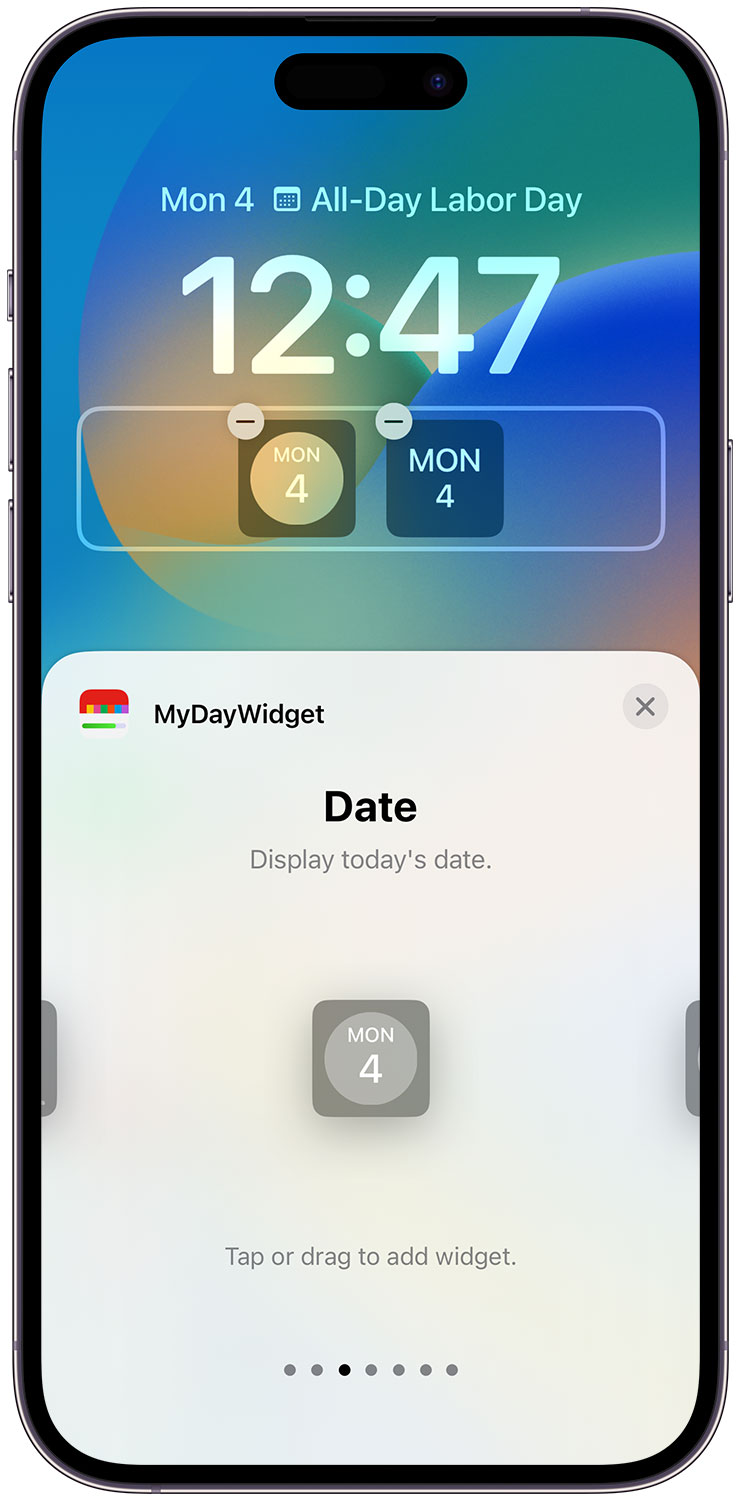
5. Scroll horizontally to pick the widget size and design you prefer.
6. Tap or drag the widget you wish to add to the Lock Screen.
7. When you are finished, tap the close button, then tap “Done.”
(Similar process for iPad)
For more information please visit: https://support.apple.com/en-us/HT207122
Adding Widgets to Notification Center on a Mac
1. Click on the Date and Time in the upper-right corner of the screen.
2. At the bottom of the Notification Center, click ‘Edit Widgets.’
3. In the left pane, click on MyDayWidget.
4. Choose your preferred design; some widgets come in multiple sizes.
5. To add the widget to your Notification Center, hover over the widget in the preview, then click the Add button (represented by the ‘+’ icon).
6. When you are finished adding widgets, click ‘Done’ at the bottom of the active widgets in the Notification Center.
For more information please visit: https://support.apple.com/guide/mac-help/add-customize-widgets-notification-center-mchl52be5da5/mac
Adding Widgets / Watch Face Complications to Apple Watch
Before proceeding, please ensure you have successfully configured MyDayWidget on your iPhone, and that you are on the Free Trial or have purchased One-Time Purchase.
1. If MyDayWidget isn’t automatically installed on your paired Apple Watch, open the Watch app on your iPhone. In the ‘My Watch’ tab, scroll down to locate MyDayWidget and tap ‘INSTALL.’
2. Once installed, open the MyDayWidget app on your Apple Watch.
3. If the status remains ‘Inactive,’ tap on the text. Wait until it changes to ‘Purchase Status: Active.’
4. You can now add widgets or watch face complications to your watch face, either from your iPhone or directly on the Apple Watch.
Please note: When you first open MyDayWidget on your Apple Watch, it will check your purchase status, verifying whether you are in the free trial or have acquired the one-time purchase. To ensure a smooth verification process, please have MyDayWidget open on your iPhone simultaneously.
Widget Layout
Each widget design has its own advantage, here is the general explanation of what information you will see on widgets.
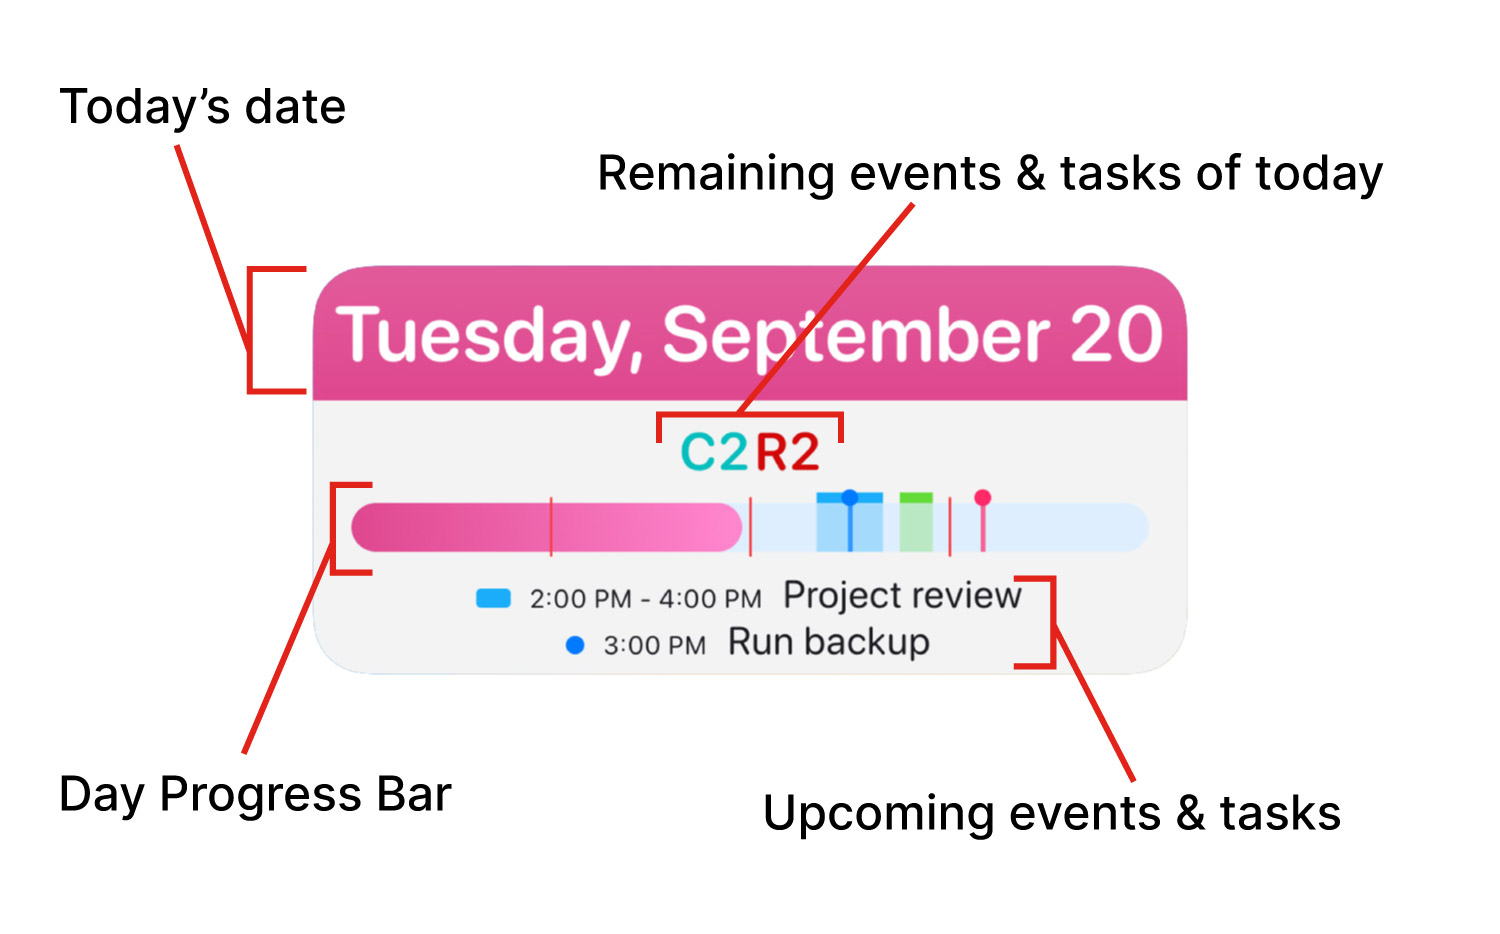
Today’s Date:
Displays the current date.
Remaining Events & Tasks for Today:
This section shows the number of remaining calendar events and reminder tasks for the current day. ‘C’ stands for Calendar, and ‘R’ stands for Reminder. If you have any overdue reminder tasks, they will be displayed here in parentheses. You can customize the colors in Settings > Calendar/Reminder Advanced Settings.
Day Progress Bar:
The Day Progress Bar visually represents the passage of time on the current day. You can configure the appearance of the progress bar in Settings under the Progress Bar section.
Upcoming Events & Tasks:
This section displays upcoming calendar events and reminder tasks. By default, if the widget has two lines of titles, the first line shows calendar events, and the second line shows reminder tasks. If you prefer to display both calendar and reminder events in chronological order on both lines, you can adjust this in Settings > Calendar/Reminder Advanced Settings.
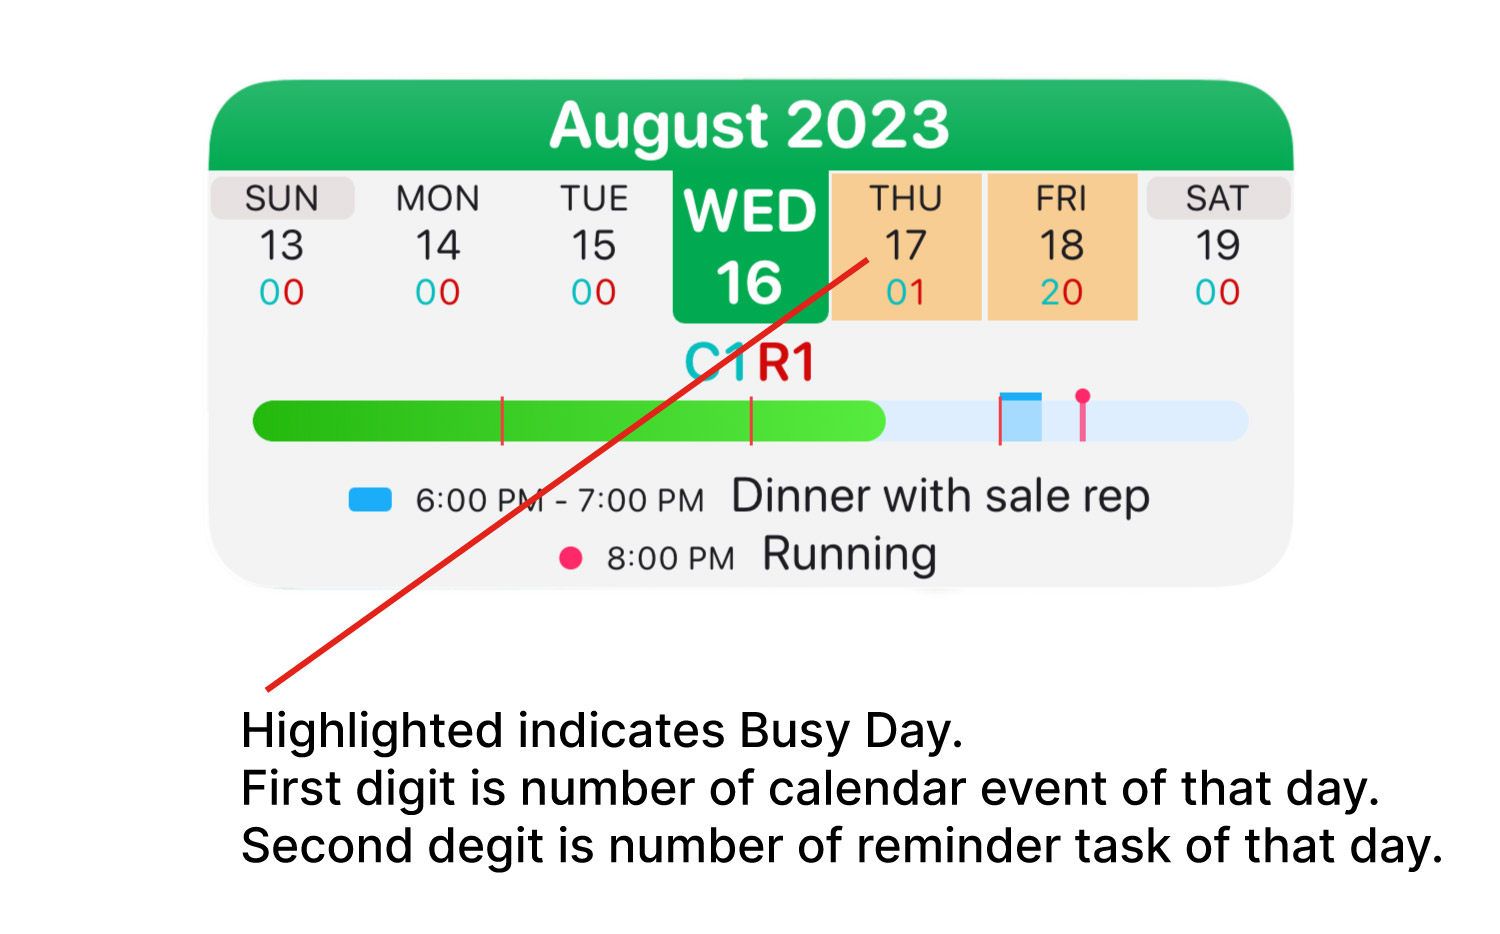
Busy Day Highlight:
You can activate Busy Day Highlights in the settings. Once enabled, you have the option to include or exclude reminder tasks.
How to Configure Widgets
You use the app interface to control widget appearance and other configurations. The app consists of three tabs:
‘Settings’ tab
- Manage data and widget appearance.
- Select information to appear on the widget.
- Choose destination apps for widget tapping.
‘Widgets Preview’ tab
- Use this tab to preview how widgets will appear.
‘Widget Tapping’ tab
- Use this tab to select your preferred apps as destinations when tapping on a widget.
Numerous customization options are available, and you might find yourself toggling between the ‘Settings’ tab and the ‘Widgets Preview’ tab to view updated widget layouts.
Notes
Stay Current with smart updates
The information shown on a widget is designed to provide you with timely updates rather than real-time minute-by-minute changes. MyDayWidget intelligently refreshes throughout the day to display information when you need it most. To manually update the information on a widget, simply open the MyDayWidget app or tap on a widget, then return to Home Screen.
Calendar & Reminder Data
Calendar and reminder data used in widgets are retrieved from Apple’s default Calendar and Reminders app. Please ensure that calendar and reminder accounts you wish to use are set up in Settings>Calendar>Accounts and Settings>Reminder>Accounts.
Widget Refresh
Widgets may take some times to load or refresh for the first time after you change settings within this app. Afterward, the process will be smoother.
PRIVACY FIRST
MyDayWidget never collects or shares your information. The app retrieves your calendar and reminder data from your device and displays them on the widget. Access Permission is required for Calendars, Reminders, and in some cases, Contacts. Your data stays on your device, always.